Introduction
I came into Big Idea having no idea what I wanted to do with my final project. I wanted my project to have meaning outside of the class so I could use it after the class ended. I wanted it to be challenging but also manageable. I eventually landed on the idea of a MIDI Keyboard, which I later proposed.
What is a MIDI Keyboard?
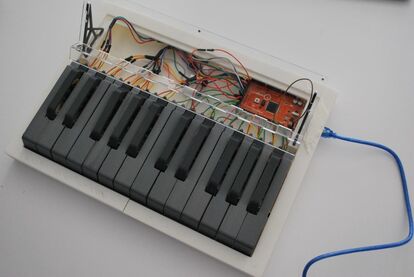
A MIDI Keyboard is essentially a piano attached to a laptop. The keyboard is an add on so that it is easier to visualize and play the notes when creating music. It also makes the music feel more handmade and less perfect and programmed, which I appreciate. Whenever the note on the keyboard is pressed, the correlating note will also be programmed to the piano roll on my music creation software (aka DAW). The best part of a MIDI keyboard is that it can play any sound that is programmed on the DAW, so it is universal to any sound.
I love creating music and producing different types of music. I had previously wanted a MIDI keyboard before the class but never bought one because they cost, at the least, $100. With this project, my goal was to create a MIDI keyboard to overall make my own music at a fraction of the cost.
I love creating music and producing different types of music. I had previously wanted a MIDI keyboard before the class but never bought one because they cost, at the least, $100. With this project, my goal was to create a MIDI keyboard to overall make my own music at a fraction of the cost.
|

|
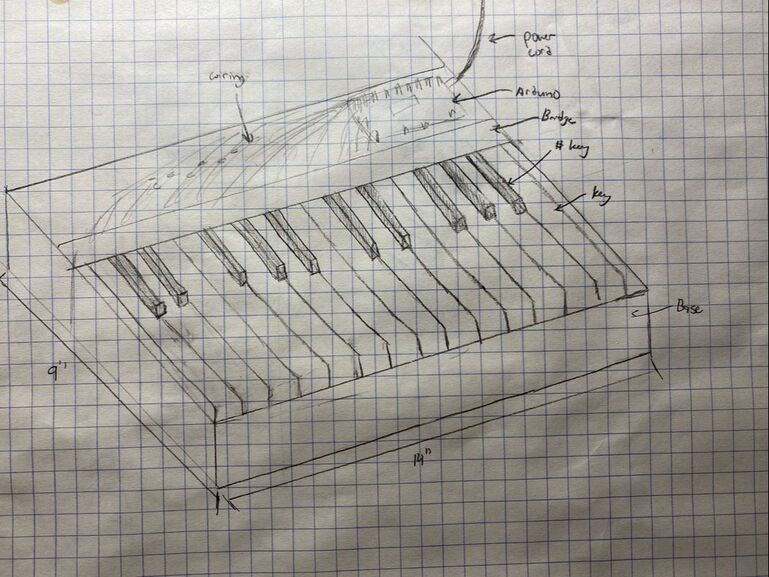
Original Sketches
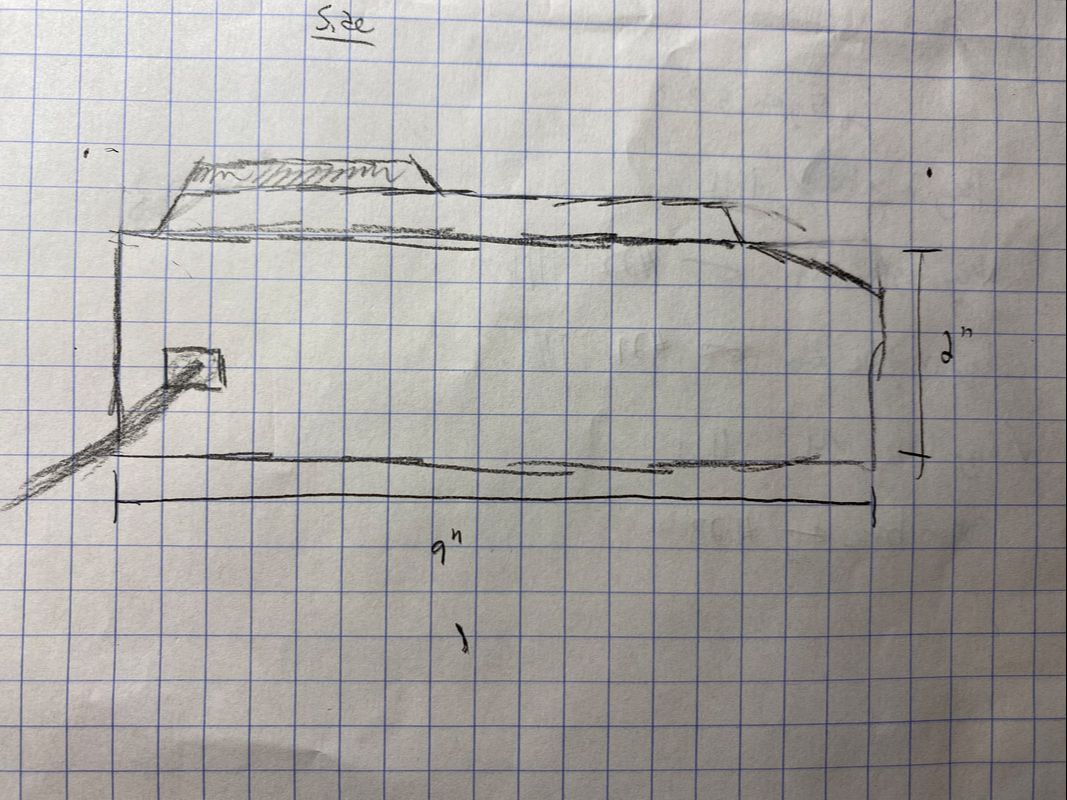
Side View
|

Top View
|
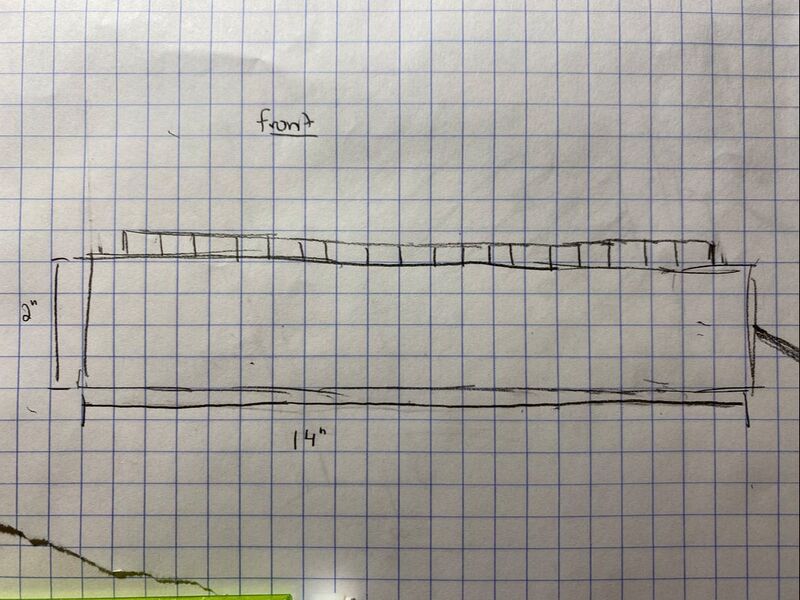
Front View
|
Initial Design and Time Management
Once I had my initial sketches thought out, I had to think about time management and staying on track throughout the project. I had to use 3 machines in the lab in order to get full credit for the project.
Machine 1: 3D Printer
Machine 2: Vinyl Cutter
Machine 3: Arduino
I used the 3D printer for the Keys and base, the vinyl cutter for a simple decal, and the Arduino to code my MIDI. After I decided all of my components, I created a gantt chart in order to manage all of my time. The gantt chart splits each project up into its own component in order to know specifically when each task needs to be completed.
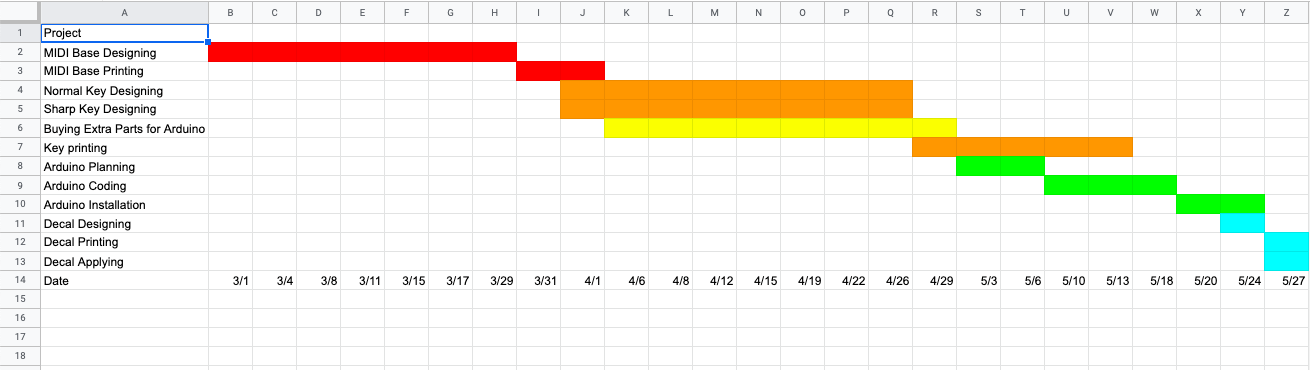
Gantt Chart for Time Management
Producing the MIDI is mostly design focused rather than using skill on different machines. It was going to be a lot of designing, but I was willing to take on the challenge. The main parts I had to design were the base and the keys. I had to create a mechanism that would allow for the keys to press a button when pressed. I landed on the idea of using a spring loaded mechanism that would keep the key upward until pressed.
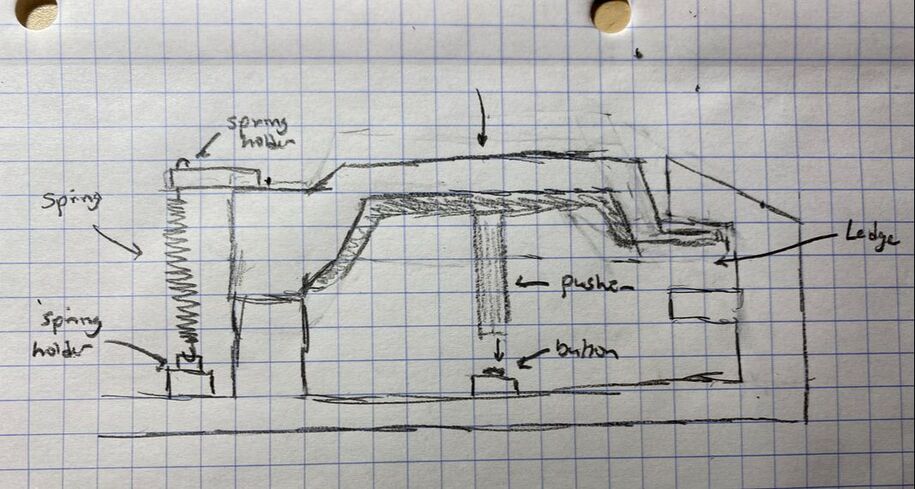
Original Sketch of Key Mechanism
Design Process: 3D Printer
The 3D printer was the main machine I used for my project. In addition to actually printing them, designing the parts was by far the most difficult part.
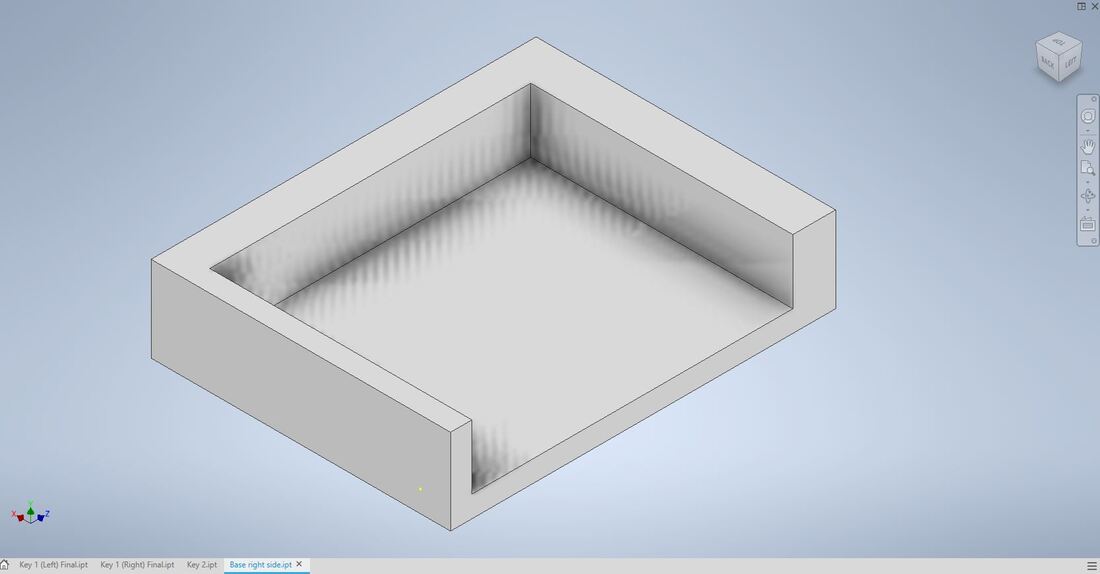
Base
|
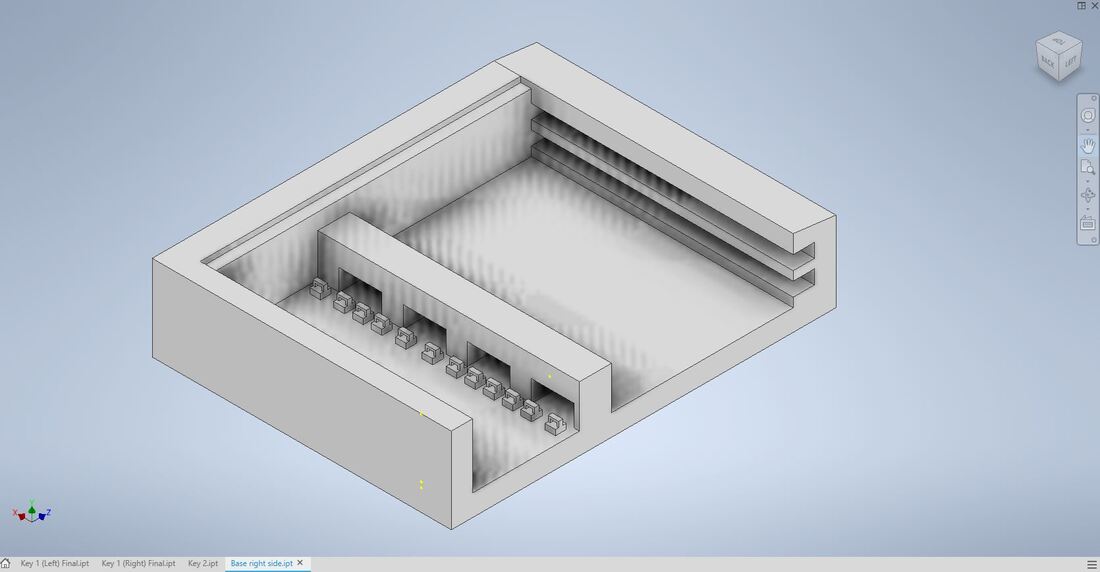
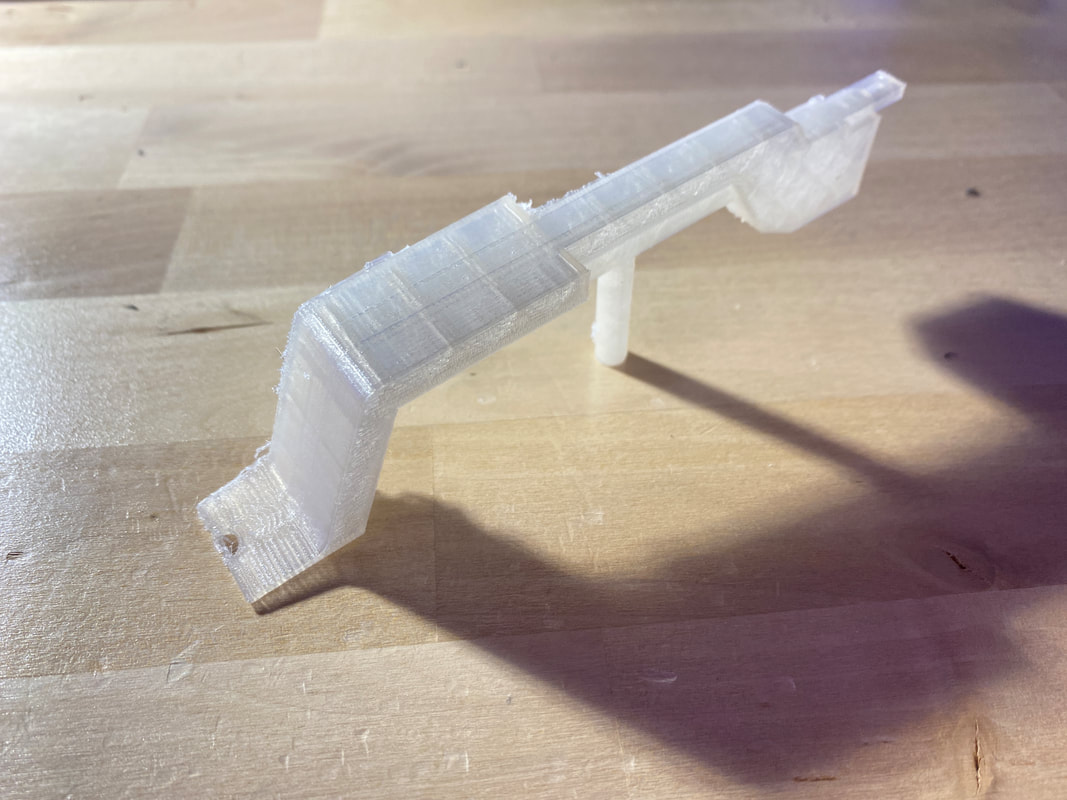
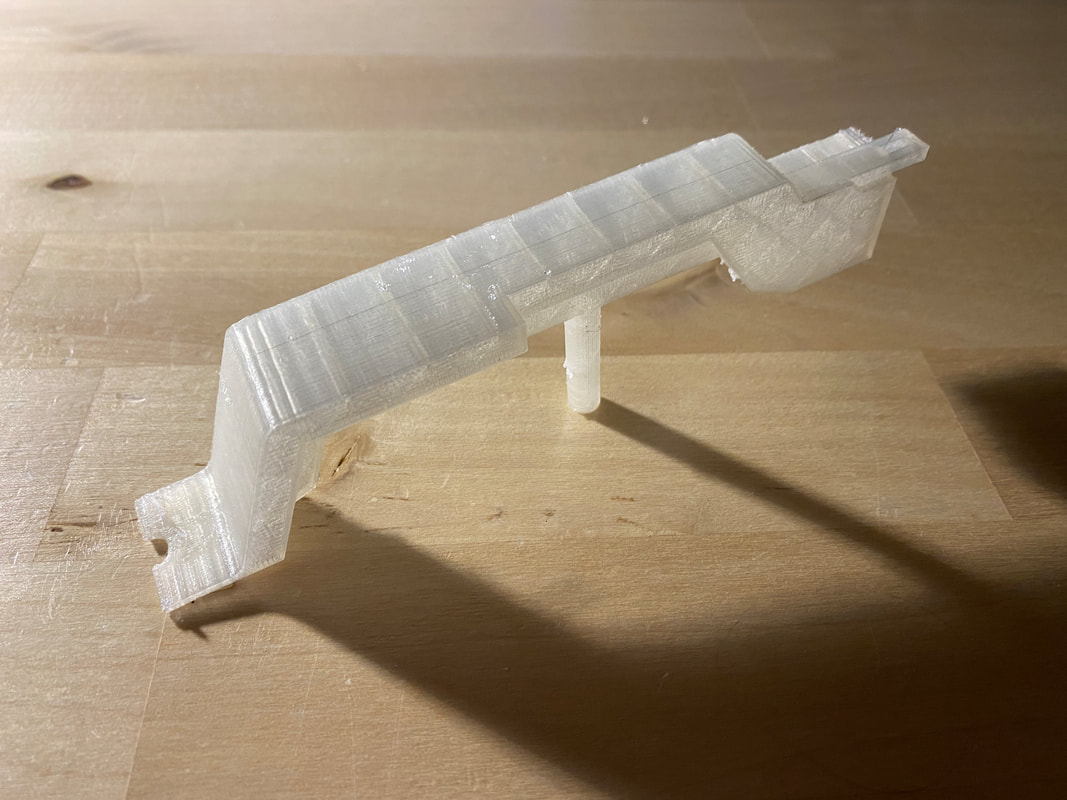
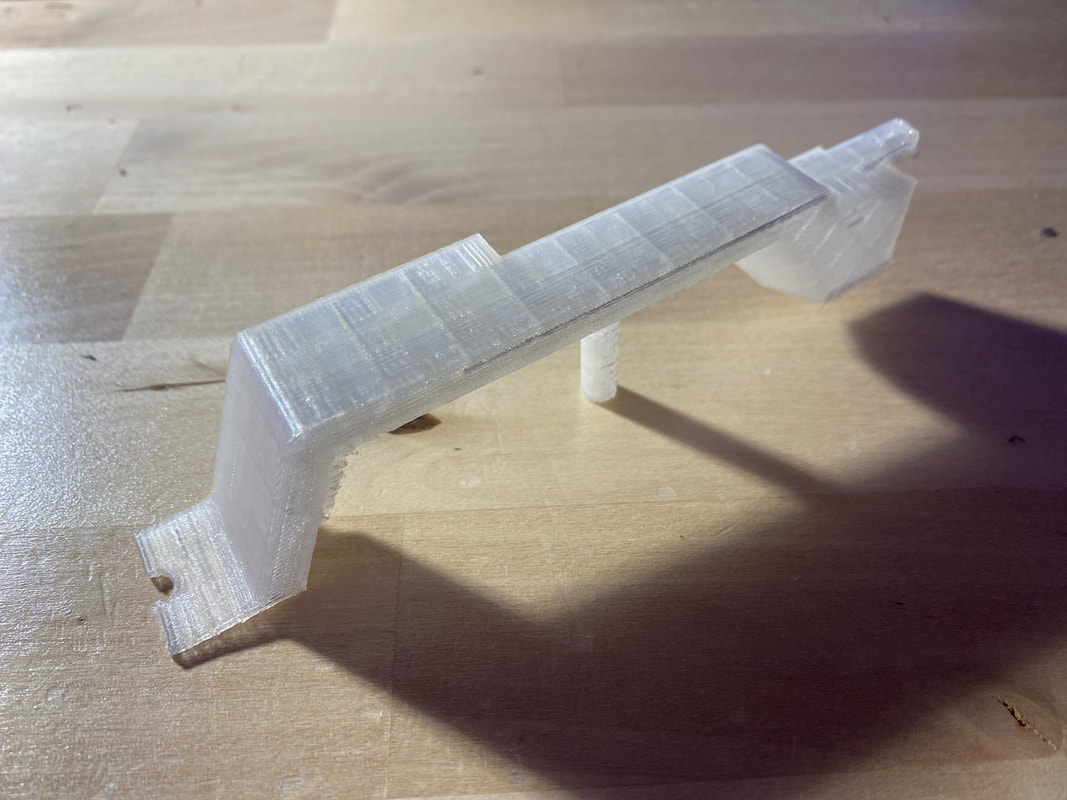
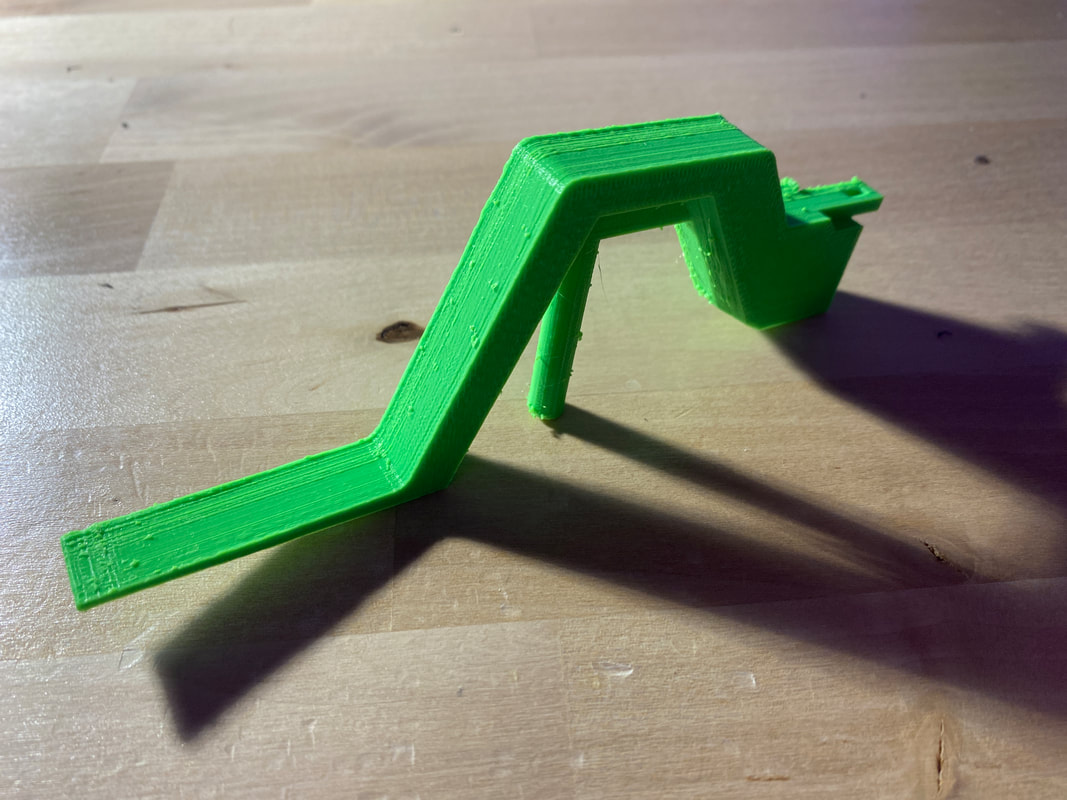
The base was a fairly simple overall structure with a few minor changes. The main use of the base is to create a house for the keys and Arduino so that they can function together. The simple looking base becomes complicated when all 24 keys need to function correctly.
|
|
|
|
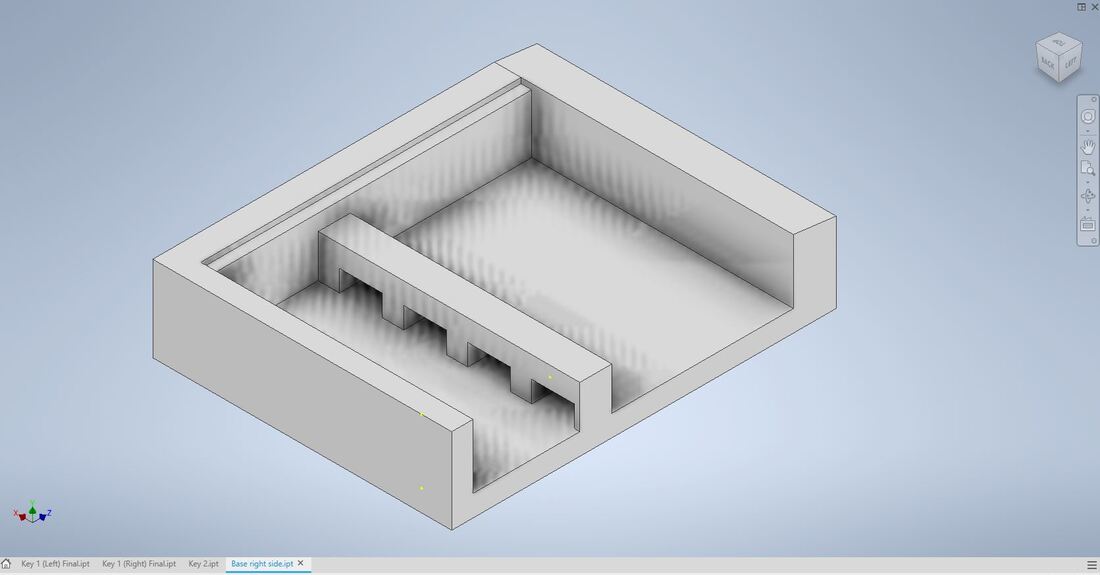
For the functionality piece, I added a bridge in the middle for the keys to sit on top of, which the wires could also flow underneath. Behind that I also added hooks for the springs to attach to, which hold the keys in place. Lastly, after making adjustments with the keys, I created two ledges in the front as holders for the keys when they aren't being pressed.
|

|
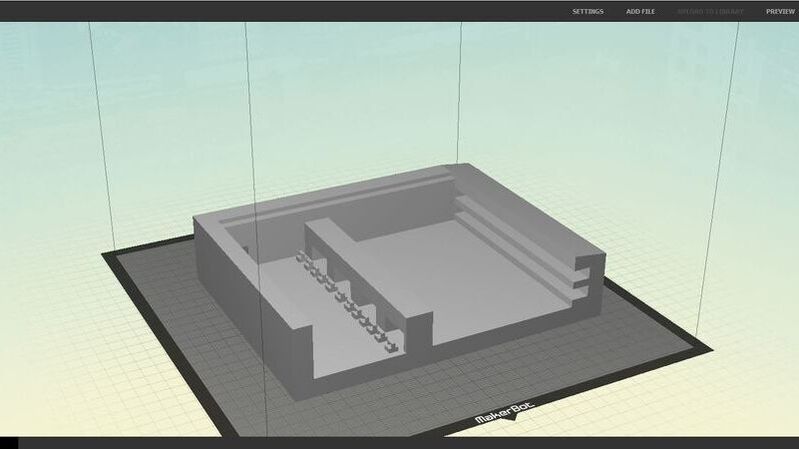
Note: I had to cut the base in half in order for it to fit on the printing bed. It was mirrored on the other side.
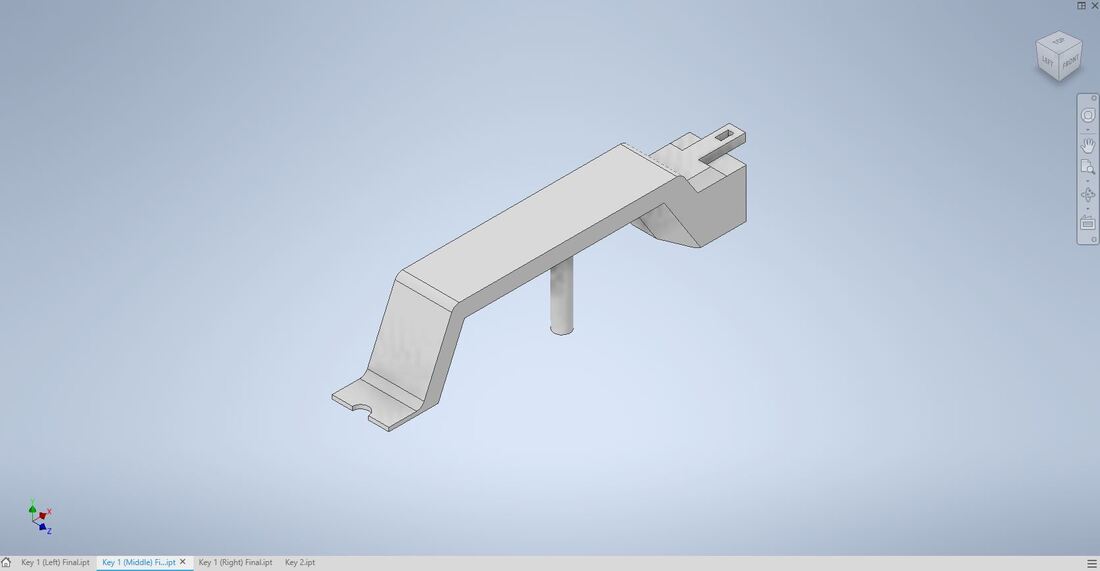
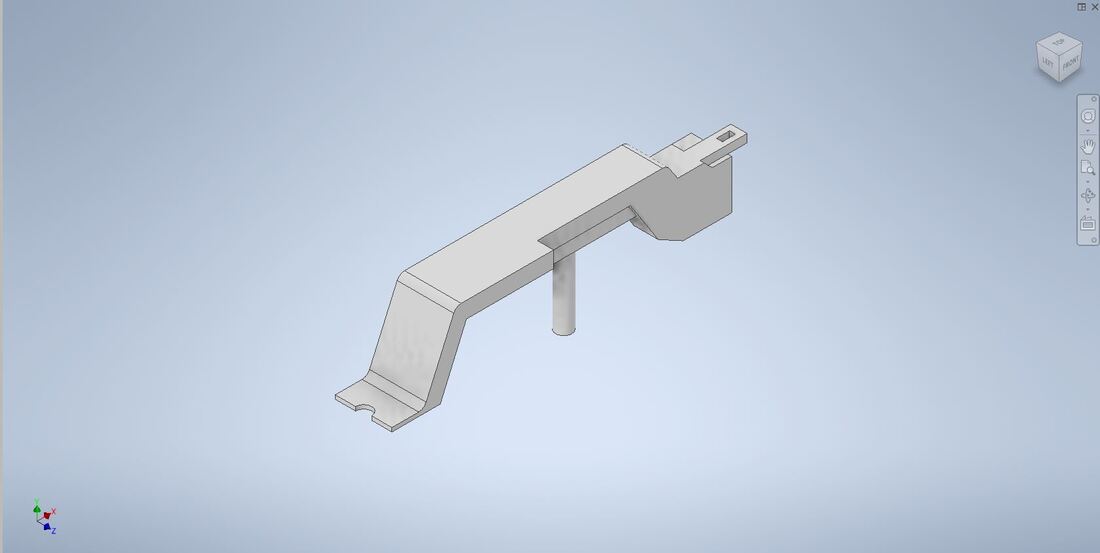
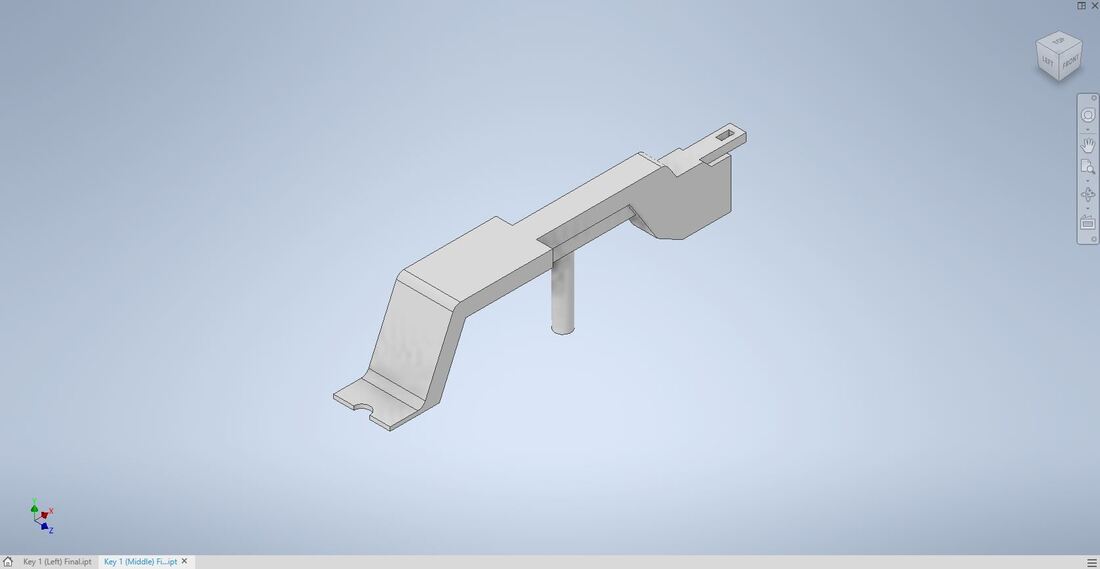
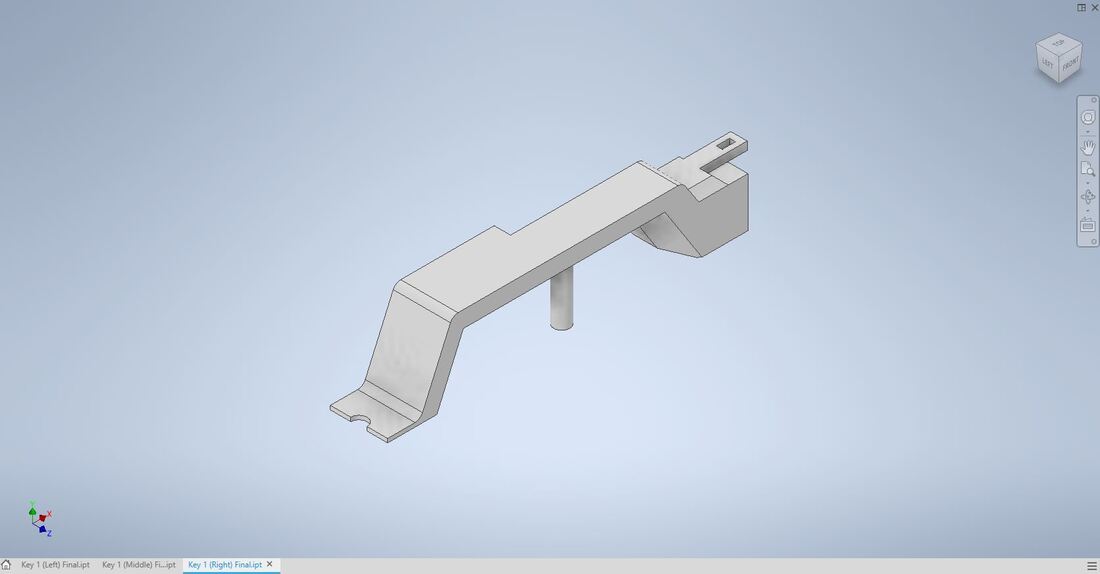
Keys
|
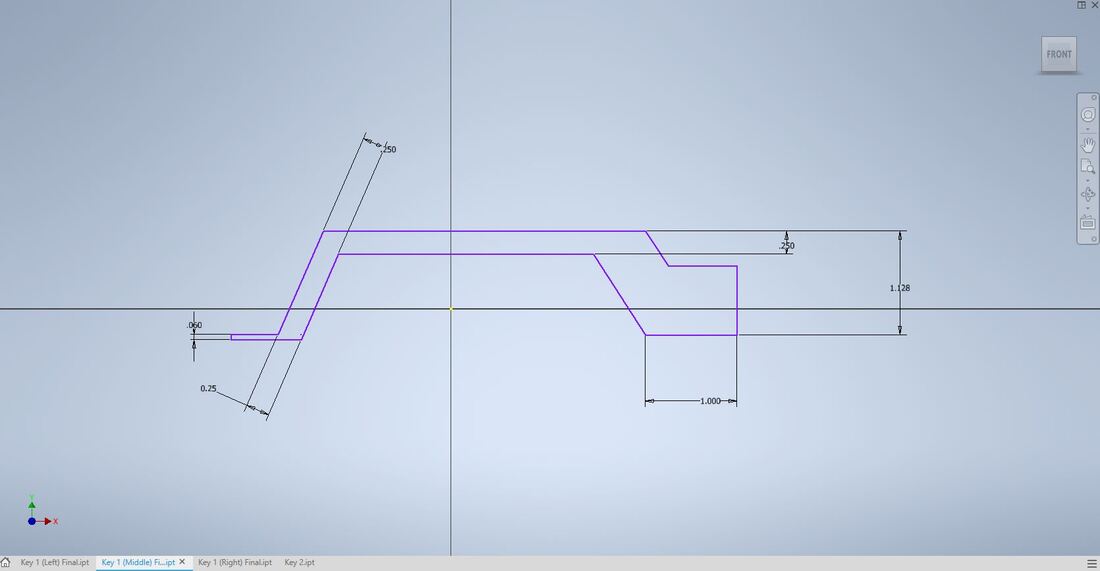
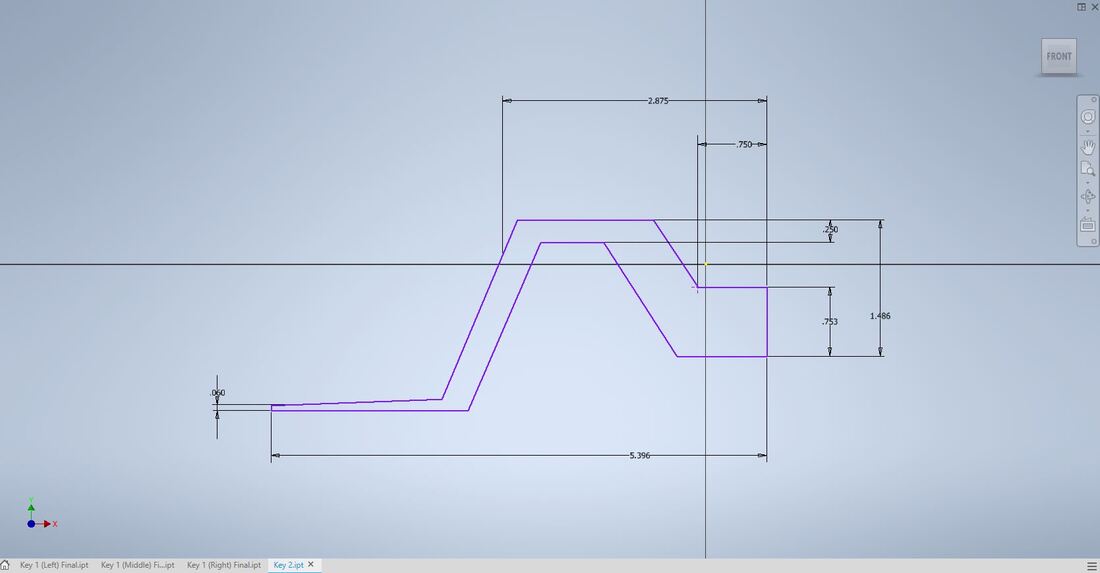
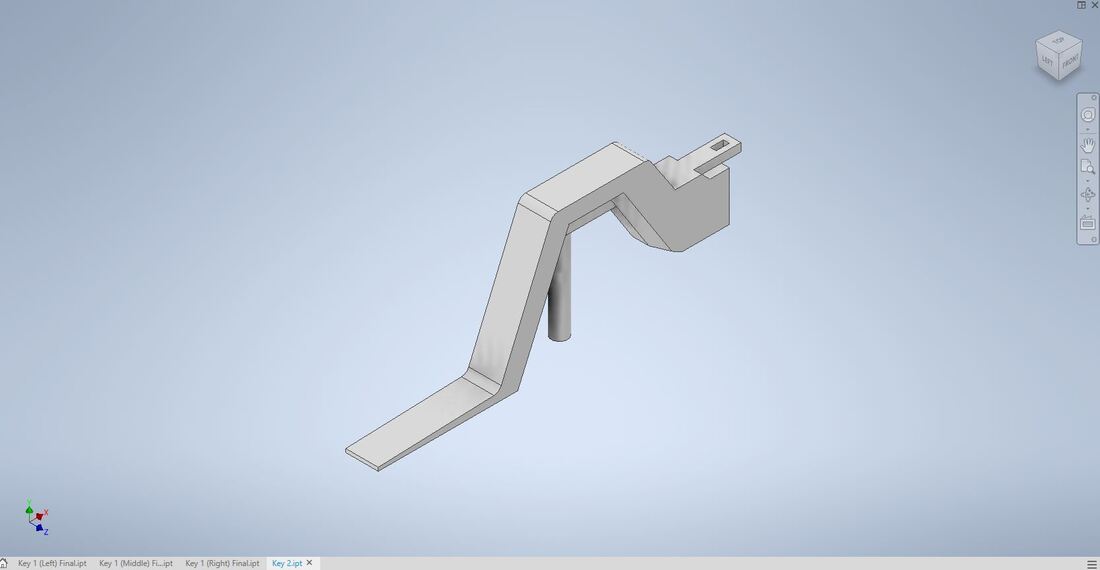
To begin I made a rough draft of a normal key in inventor that looked similar to what I had thought it out to be. With extrusion, fillets, and chamfers, the keys began to look more interesting and complex. I also had to take into consideration the spring attachment and the button pusher on the bottom of the key.
|
|

|
|
Once I had the key finished, I had to create 3 different keys because of how piano keys fit together across the board. I easily did this by cutting out a quarter inch on either the left, right, or both sides of the key so that the sharp key could easily slide in between each one.
|
|
|
Next, I began the process of designing the sharp key that sits in between the normal keys. During this process I faced challenges because I had to make sure I could press each key down without another one being pushed down additionally. My solution to this was to create a second ledge in the base so that the sharp key would sit below the other keys. Other than that change, the sharp key was fairly easy to design because I was able to use the same techniques I previously used to design the other keys.
|
|
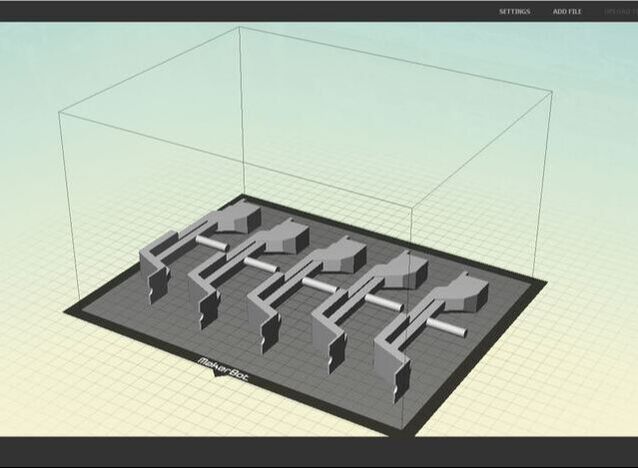
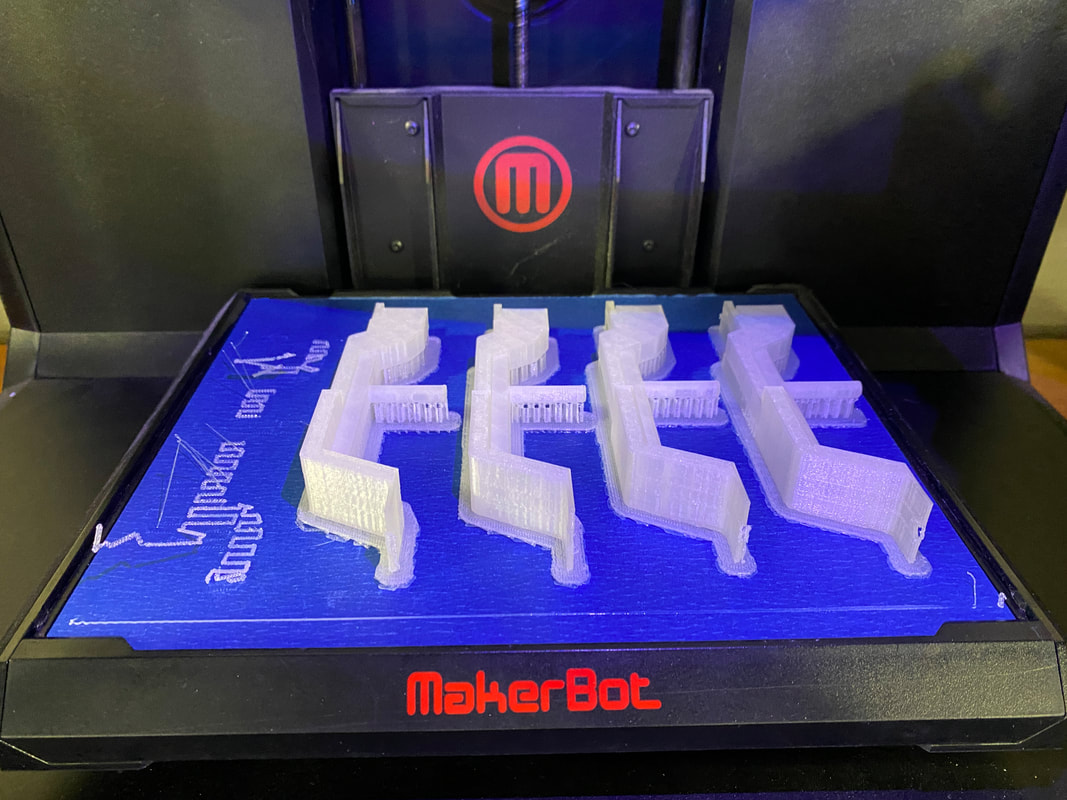
After the keys were designed, it was time to start printing. I had to print 24 keys in total (4x left keys, 4x right keys, 6x middle keys, 10x sharp keys). Luckily they were pretty easy to print because I was able to print 4-6 keys each print.
|
|
Here are the final results of the keys after being printed.
|
|
Design Process: Vinyl Cutter
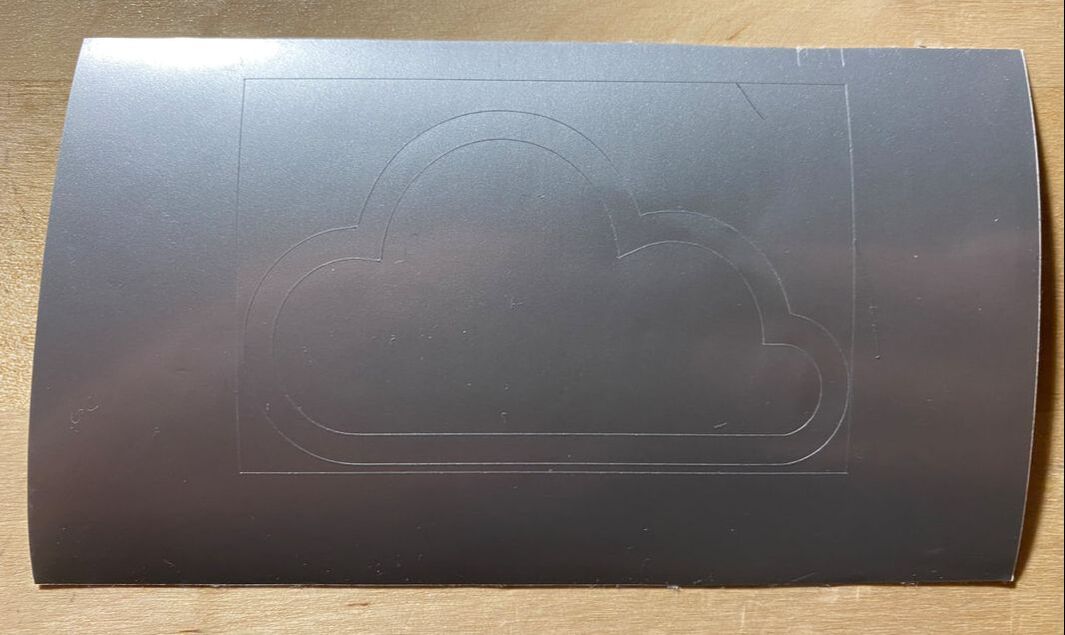
For the vinyl cutter, I wanted to add some customization to my MIDI that other people wouldn't have. Since my keyboard is fairly simplistic anyway, I decided to create a decal that was simple as well.
|
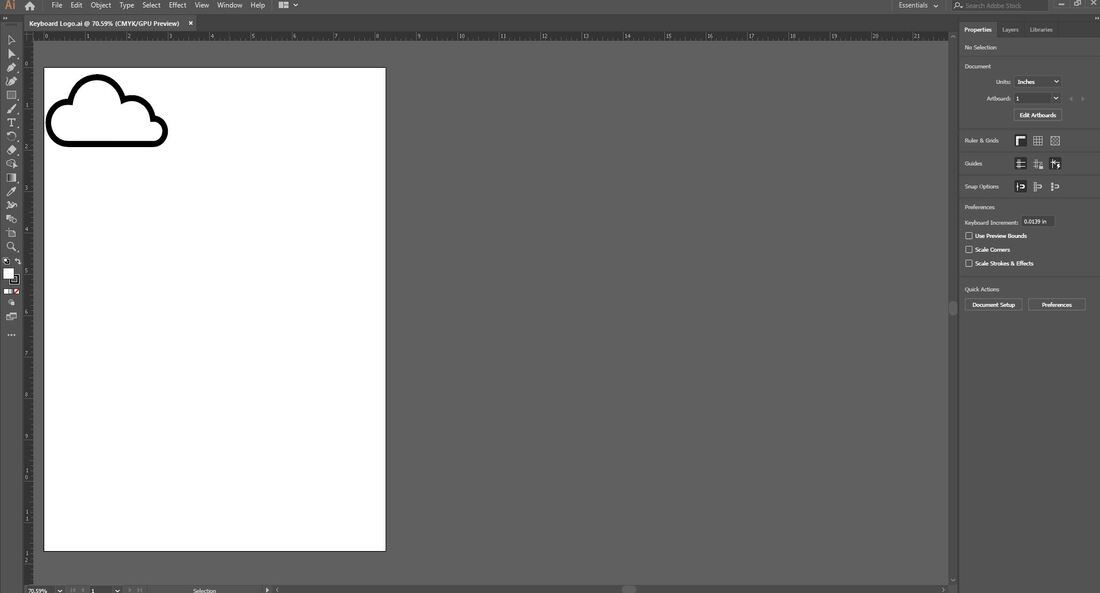
I picked to use a cloud because I think that it embraces the light and airiness that the keyboard has already. I also think that the cloud looks pretty cool and represents my music well.
|
|
|
|
|
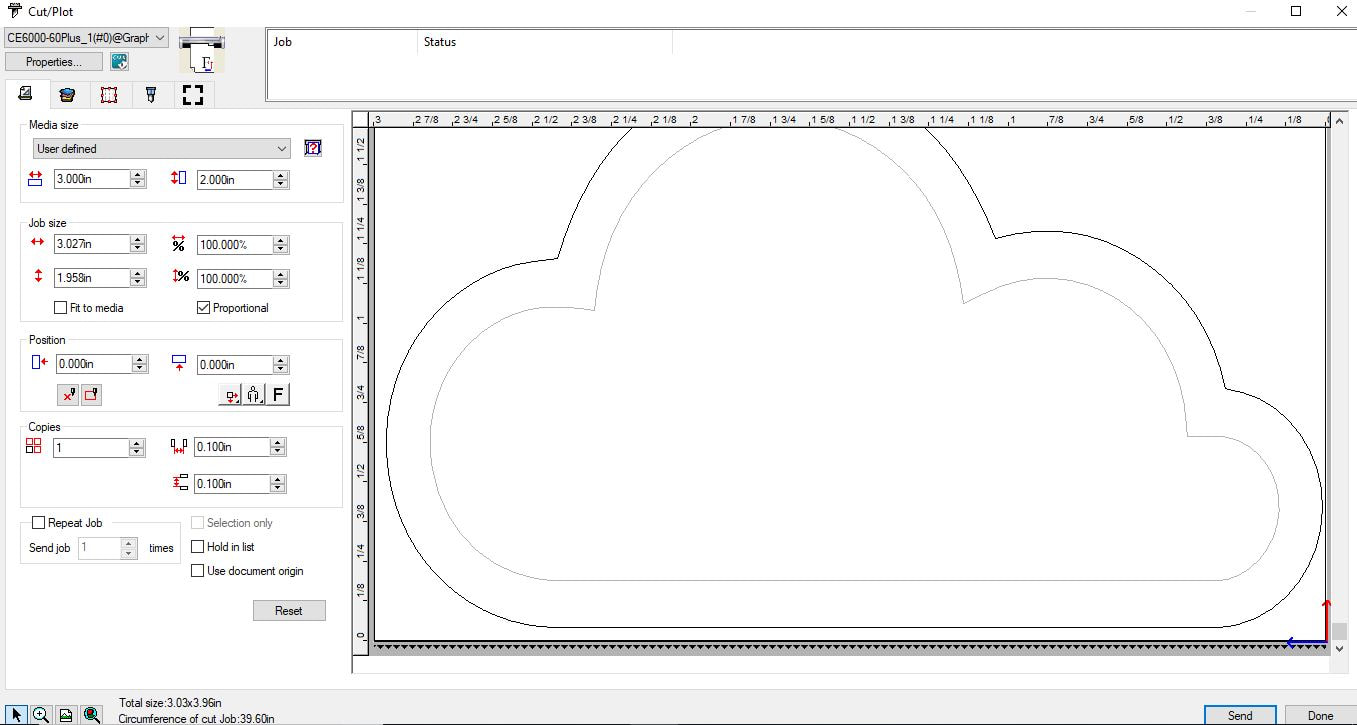
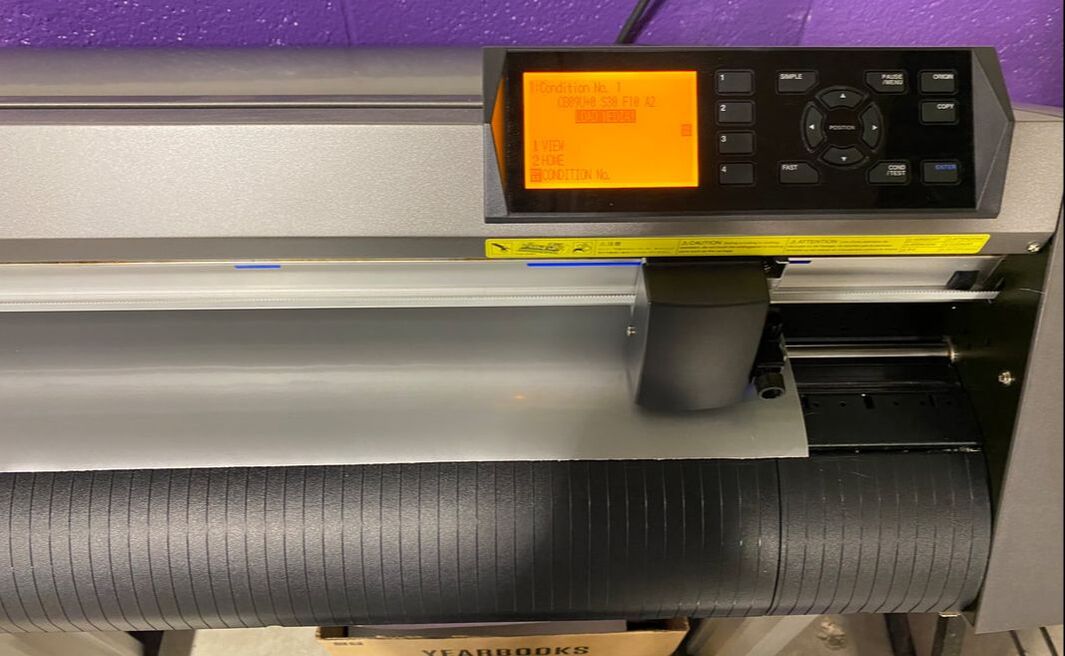
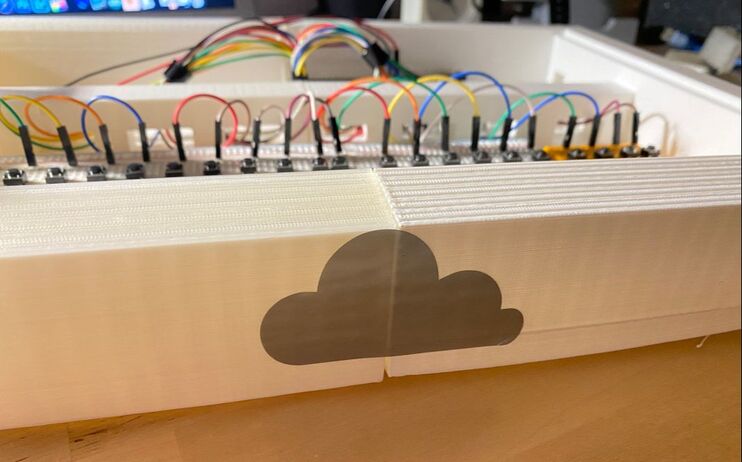
After I had created the cloud outline in Illustrator, I transferred it to the vinyl cutter computer. I programmed it so that the vinyl cutter would outline the cloud so I could choose between either the solid cloud, the outline, or use both. After I cut it out, I applied the decal to my keyboard.
|
|
Design Process: Arduino
I knew from the beginning that the Arduino part of this project was going to be the most complicated portion of the project. It took an immense amount of research and even more trial and error. It took a lot of perseverance to learn all of the coding and circuits with little to no assistance.
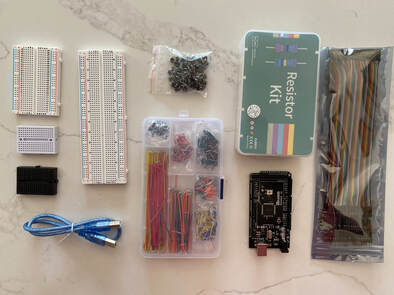
Supplies:
Arduino DUE
Buttons x24
Wires (normal & jumper)
Breadboards (varying sizes)
Resistors (weren't required)
Micro USB Cable
Arduino DUE
Buttons x24
Wires (normal & jumper)
Breadboards (varying sizes)
Resistors (weren't required)
Micro USB Cable
|
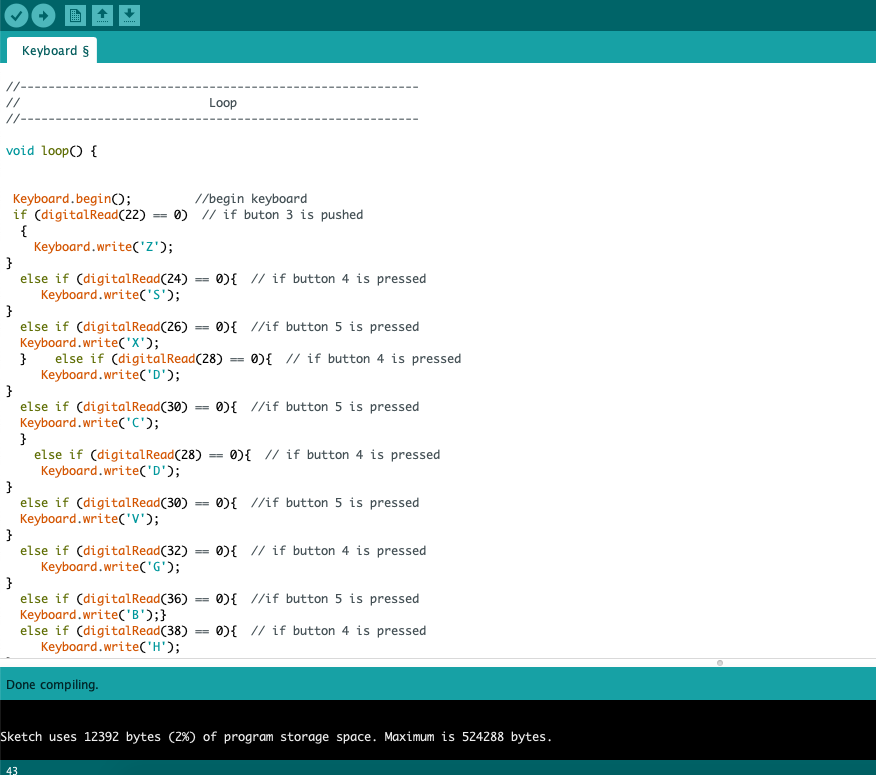
In the DAW software that I plan on using, each letter on the keyboard represents a certain note. For instance, 'Z' is the note C in the DAW. My thinking was that if I could program each key to press a certain letter on the keyboard, it could play the corresponding note in the DAW.
|
|
|
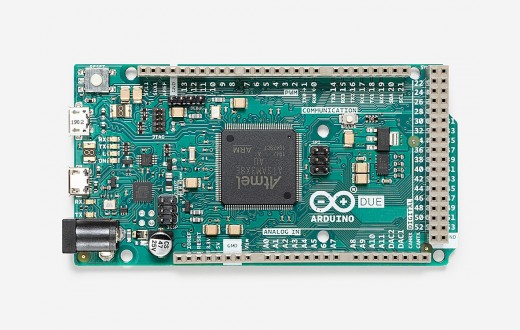
I did a lot of research on how to create a keyboard emulator using Arduino. The process was more complicated than I could have imagined. After research, I learned I needed a specific Arduino called the Arduino DUE. The DUE has a special processor allowing it to communicate with the computer via USB.
|
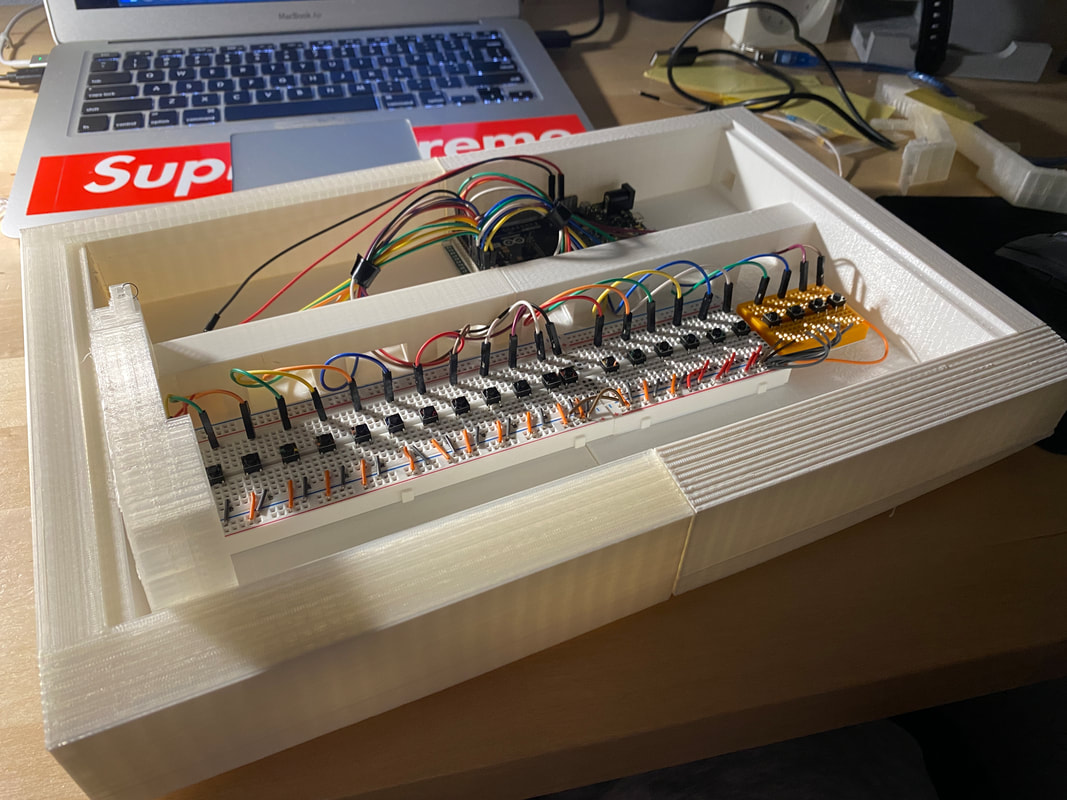
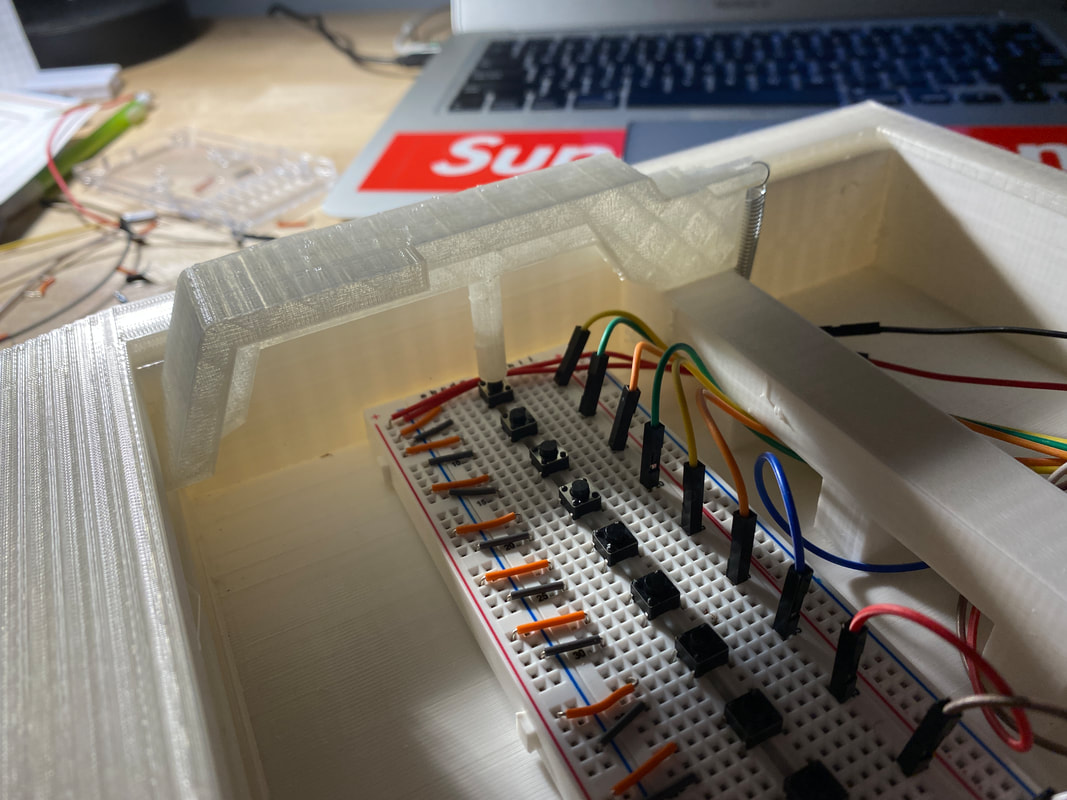
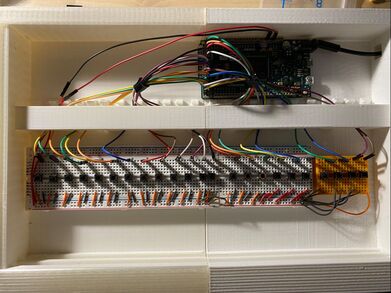
The thought process was to create a series of buttons across the breadboard. This would create a button for each key to press. Each key would receive power, connect to ground, and connect to a digital I/O pin. Depending on which button it is and what I/O pin it connects to, it would determine which letter it ends up reading as.
|
The circuit looks complicated but isn't as complex as it looks. Tedious, yes, but it is mainly just the same repeated circuit to create a line of buttons, as I previously stated.
|
|
|
Next came the coding. I based most of the code off of a video I watched of somebody doing a somewhat similar project to mine. It was fairly simple, but was also tedious. Essentially it ensured that each digital pin was connected to a certain letter. It uses Keyboard.write() as its main command along with other keyboard commands like Keyboard.begin().
(https://www.youtube.com/watch?v=SHIcliL4O14) |
|
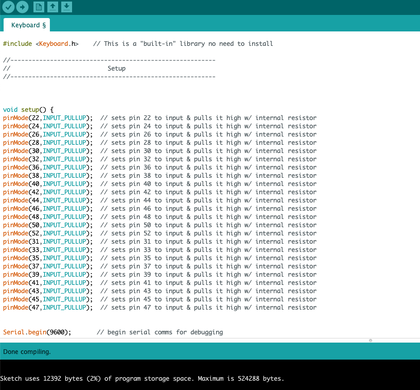
Another interesting thing about the Arduino DUE is that it has built in resistors that can be initiated using code. This is why I use command pinMode(#, INPUT_PULLUP), which creates an automatic resistors when a button is pressed. This saved me the time of finding resistors and programming voltage into the coding.
|
|
I think that Arduino was the most difficult part of the project. Although it looks simple, the amount of hard work and research that went into it was beyond exhausting. It was difficult but I'm glad that it works for the most part.
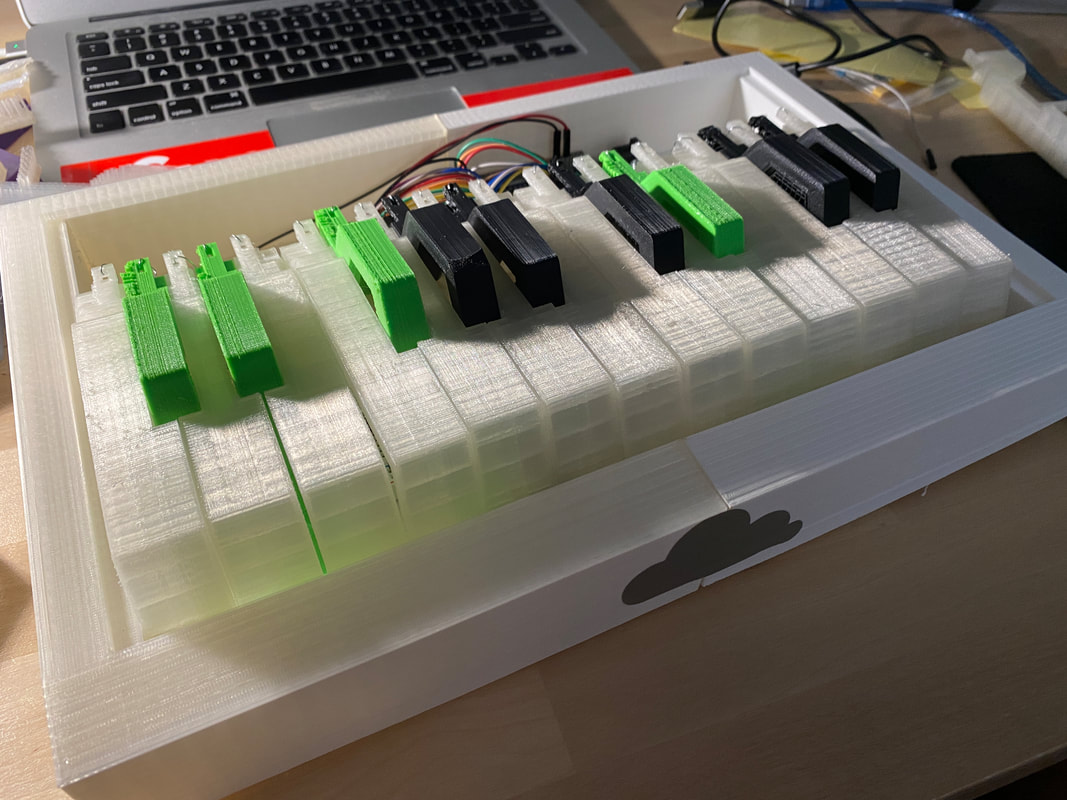
Final Product
|
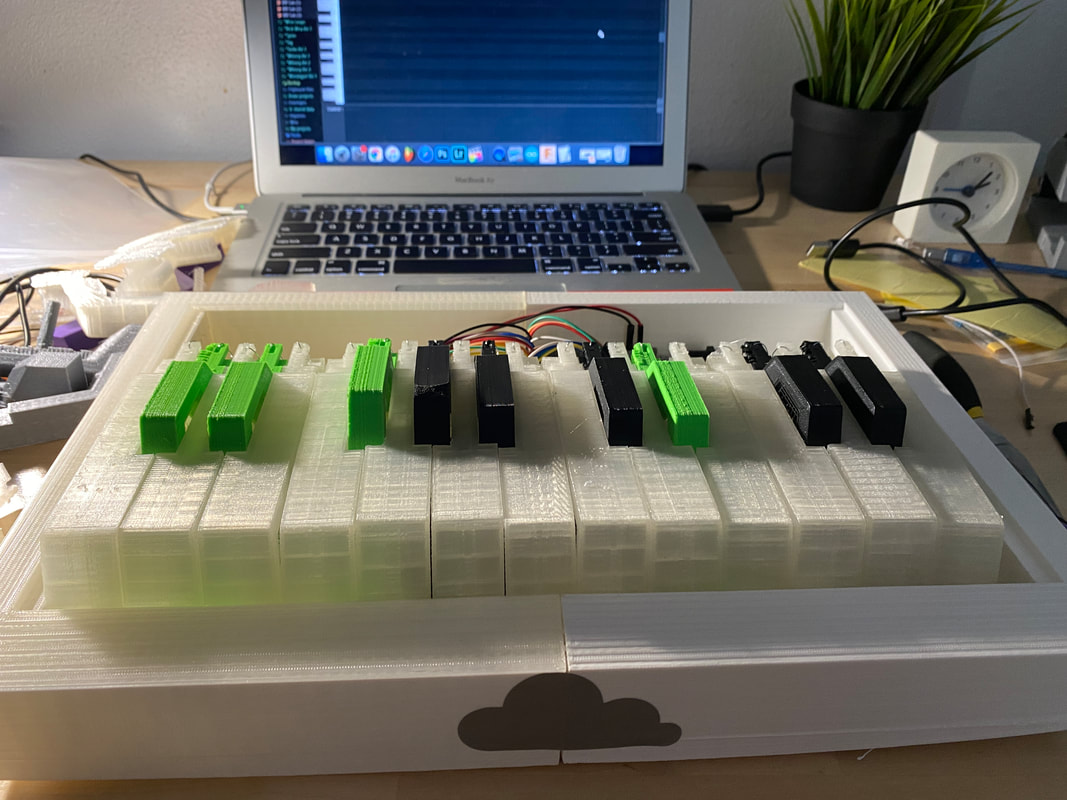
The final product turned out pretty well. It works to play the notes, but would be kind of difficult to play a song or use to actually create music. However, it does what I wanted it to do, and with some fixes, it could work really well.
|
|
Conclusion
This project taught me so much more than I ever thought it would. Not only did I develop engineering and design skills I didn't have prior, but it also helped me learn about myself. There were some nights and even days where I just wanted to give up on the project and start over. It was a difficult process sometimes, but it taught me perseverance throughout the process, and I'm glad that I stuck with it.
As for machinery, I learned a lot about 3D printing and designing in Inventor. I think that I can design a lot of things professionally in Inventor which is a really good skill to have. I also enjoy designing in Inventor quite a bit. On the other hand, Arduino was by far the hardest part of the project. I never realized how complicated coding could be. It was really difficult to do on my own, but I did my best and it turned out pretty well.
I think that over the summer I am going to refine the rest of the keyboard to hopefully make it more usable to the extent I want it to. It does work, but I think that I would be able to clean it up. I am probably going to sand the keys to make them fit better, and revise the code and possibly the circuit because it doesn't seem to be completely trustworthy the way it is now. Overall, I am satisfied with how the project turned out, but there are still some things that could be done to make this project more professional and commercial feeling.
